Print the sheet
- On the Add handwriting tab, choose Print a sheet. The dialog opens on its first step, Make the sheet.
- Choose the Page size: A4, or US Letter.
- Leave the columns and the box height as they are the first time. Bigger boxes give more detail, and more pages.
- Choose Download PDF (2 pages) (it says how many pages), open the PDF and print it.
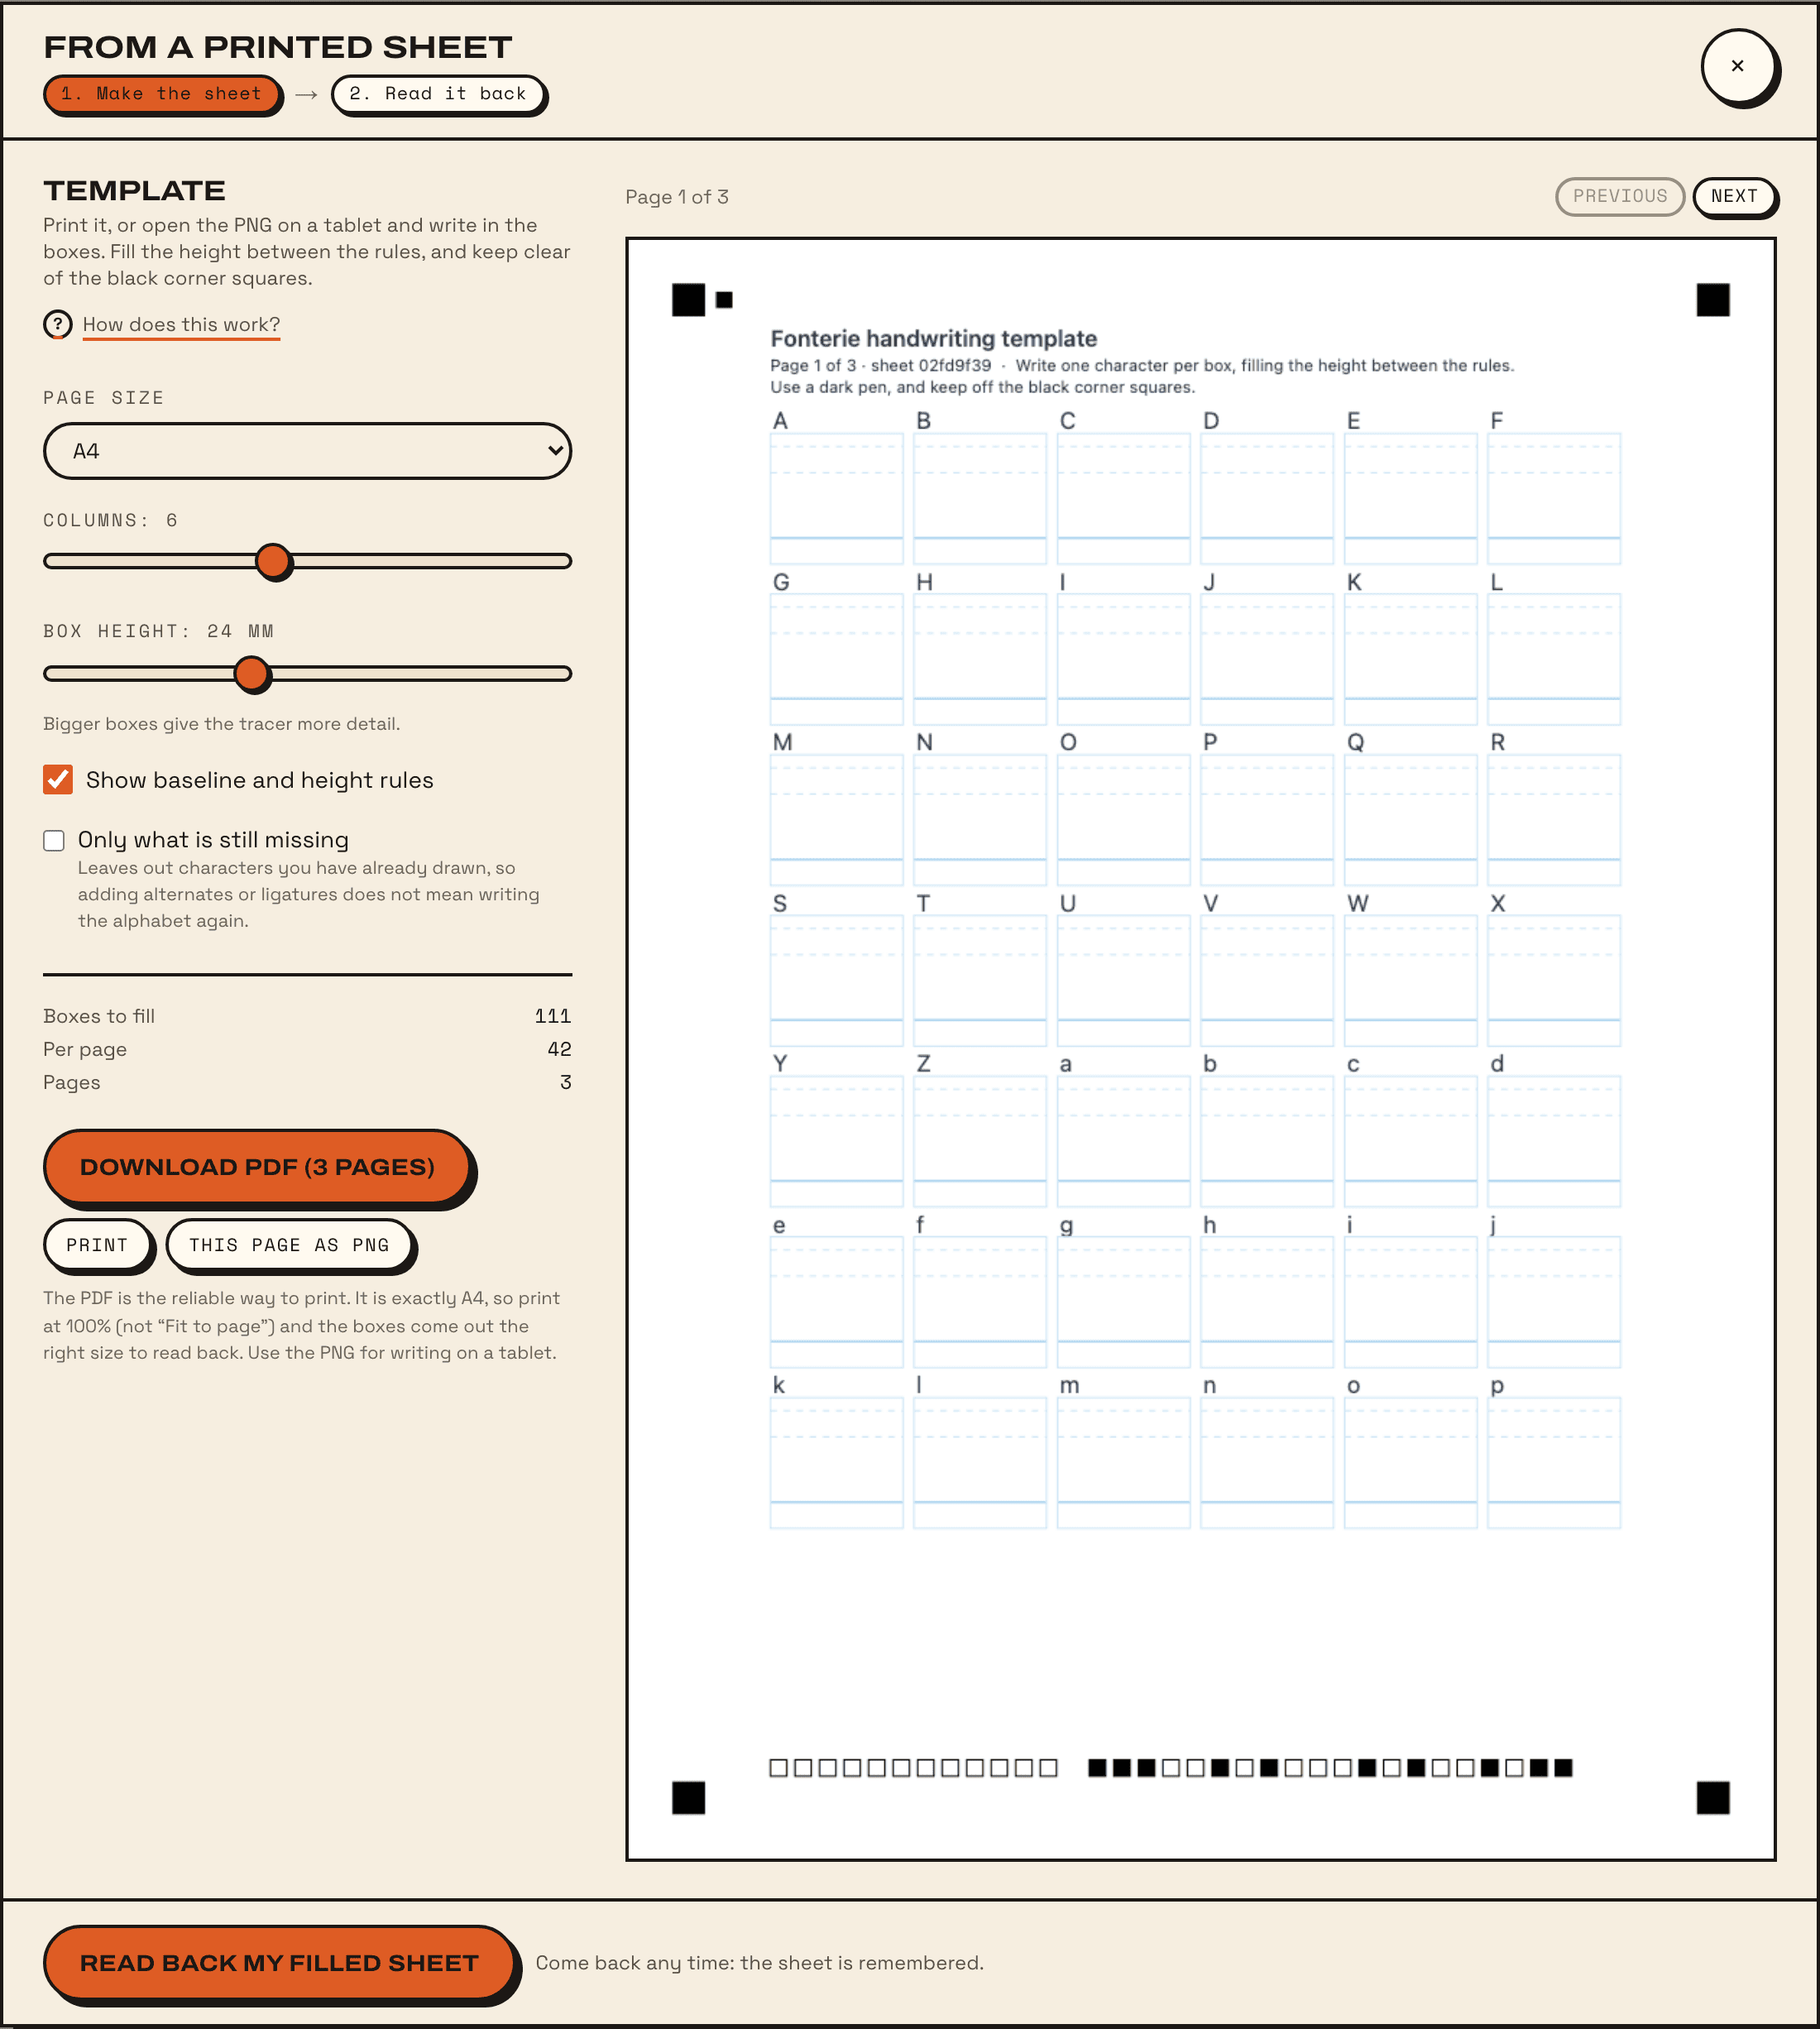
Print at 100%, never “Fit to page”. The PDF is exactly the paper’s size, and the boxes have to come out the size they were drawn to be read back. Print in the dialog works too, but the PDF is the reliable way. This page as PNG is for writing on a tablet instead of paper.
Coming back for more later, to add alternates or ligatures? Tick Only what is still missing, and the sheet leaves out what you have already drawn.
Fill it in
- Use a dark pen: a black or dark blue felt-tip or gel pen. Pencil and light ink come back faint and broken.
- One character per box, written the way you normally write it, filling the height between the rules.
- Stay inside the box. A stroke that crosses into the next box is read as part of that one.
- Don’t touch the black squares in the corners, or the row of small squares along the bottom. They are how Fonterie finds the page and knows which page it is.
- Don’t fold the sheet. If it curls, flatten it under a book first.
Read it back
Choose Read back my filled sheet in the dialog, or, on another day, Upload a filled sheet under the card on the Add handwriting tab: the sheet is remembered. Either one opens the Read it back step, with three ways in. All three are read the same way.
- Take a photo: opens the camera. Shown on phones and tablets only.
- Upload a photo: a photo you have already taken.
- Upload a scan: a PDF or an image from a scanner, including the multi-page PDF a scanner makes.
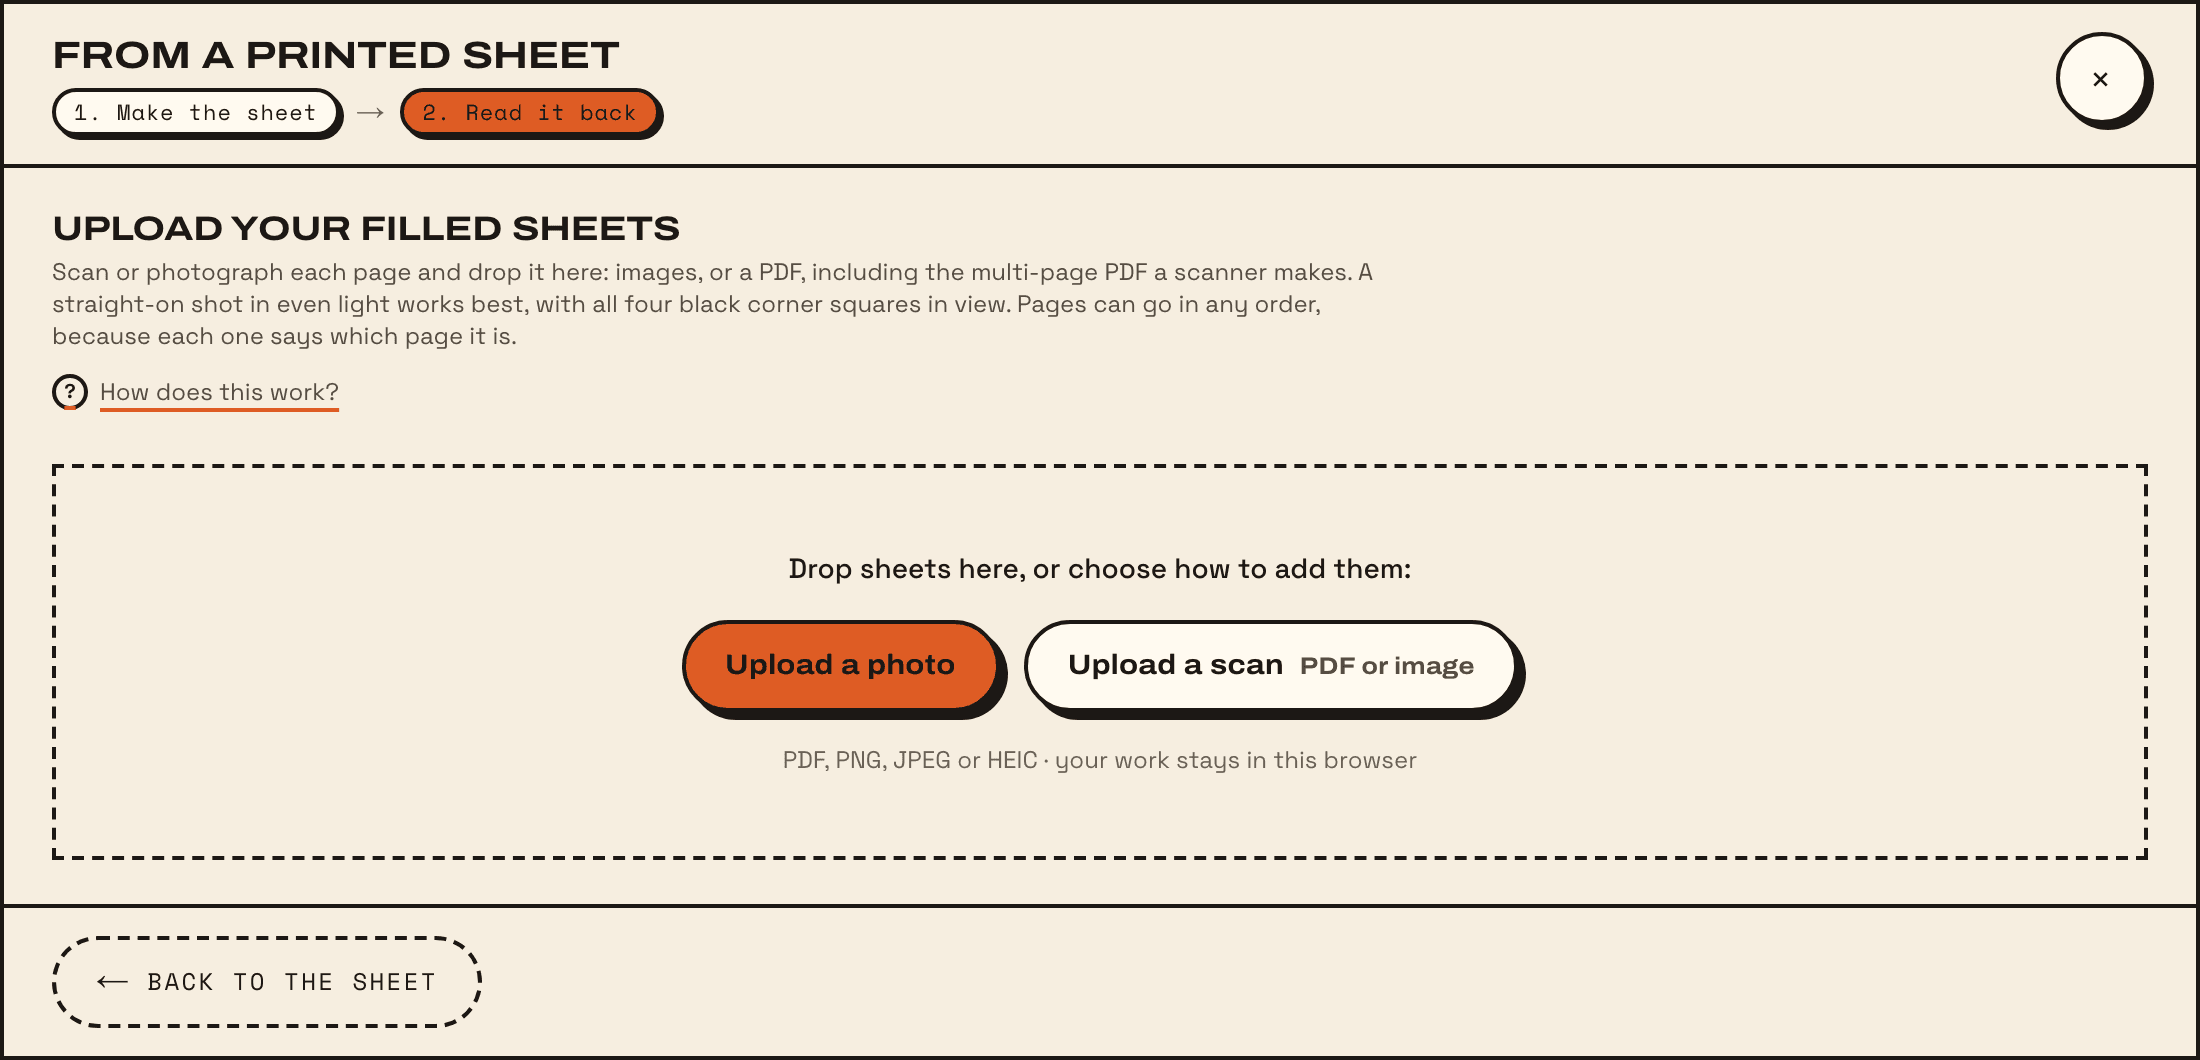
You can also drop the files onto the dialog. Pages can go in any order: each one says which page it is.
Taking a good photo
- All four black corner squares in the frame, none covered by a finger or in shadow.
- The paper flat, on a plain surface, photographed straight on from above rather than at an angle.
- Even light: daylight near a window is ideal. Avoid the phone’s own shadow across the page.
- One sheet per photo, with no other sheets showing underneath.
- Close enough that the page fills most of the picture.
When a page isn’t recognised
Each page gets a line of its own saying what was found, or what went wrong. What each message means, and what to do:
Review and add the characters
Every character found is shown under its name, selected. Click one to leave it out, or back in; Select all and Select none do the whole lot. A character marked replaces already has an outline, and adding it swaps that outline for the new one.
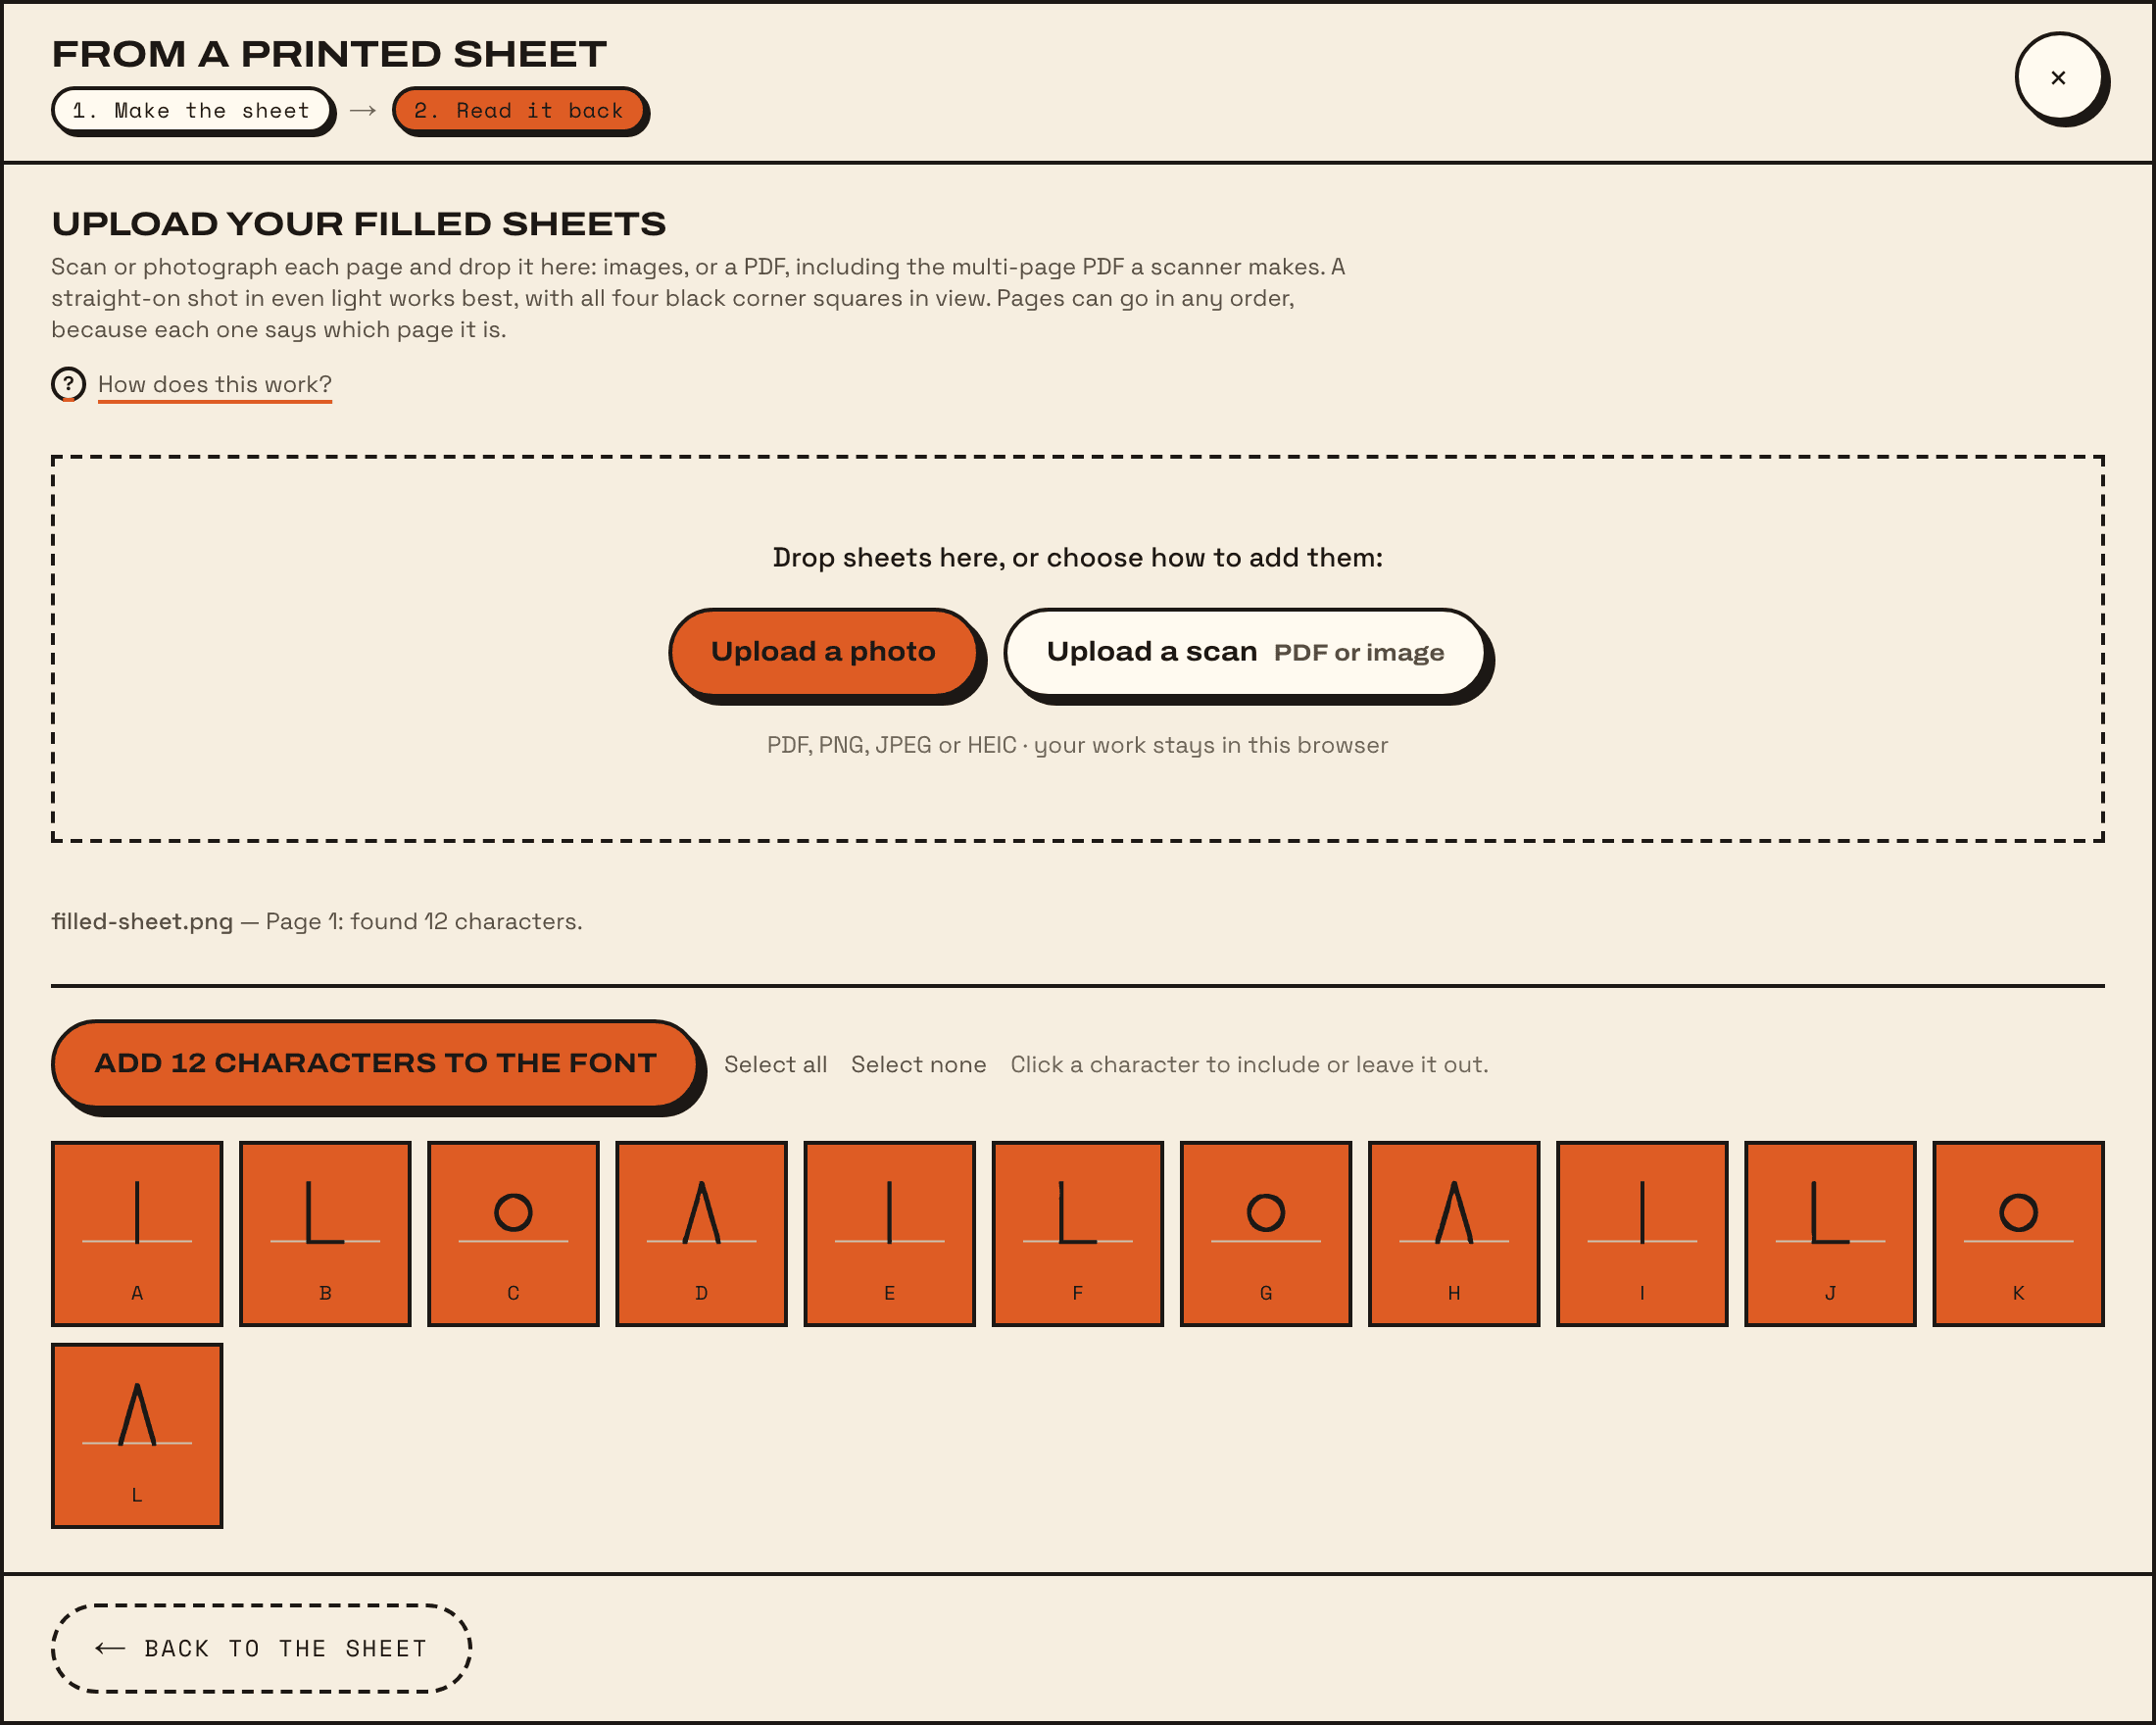
Choose Add 12 characters to the font (it counts the ones selected), then See your characters to check them over in the Characters tab.